Monday, August 25, 2014

Down the Hatch

It all started with a bag of these...  I didn't believe it when I saw it.  "You are teasing me again," (emphasis on again) I said to my husband when he brought home a steaming, hot bag of New Mexico Hatch green chile peppers from our local grocery store.  He said, "Yeah, they are roasting them in front of the store."

Freshly roasted New Mexico Hatch green chiles


Stop it.  Here?  In Ohio?


Chiles on display

 
I had to see it for myself. 


What I found was a pretty display and half a dozen volunteers roasting chile peppers and enthusiastically sharing samples and ideas on how to use these bright green beauties with a very curious lunch crowd. 


The aroma of the roasting chiles is addicting.

 
The world-famous Hatch chile is only grown in Hatch, a small town in southern New Mexico, which lies along the Rio Grande.  The soil and its proximity to water make the perfect combo for growing chiles.  And right now is harvest time, an annual event that is celebrated all over New Mexico.  


The chiles are somewhat easy to find in canned versions in grocery stores; however, the packaging must include that they are from New Mexico to be authentic. 


Fresh chile peppers are quite spicy, but once roasted some of their heat goes away and you are left with a more mild but seriously bold flavor.


Roasted chile peppers

 
Now what do I do with all these chile peppers I purchased?
 
 
Lucky for me, I found a recipe app for Hatch green chiles. 
 
 
Yes.... there's an app for that.


The chiles start out a beautiful bright green color.
 
 
In honor of the chile harvest, I'm going to put some of these recipes to good use. 
 
 
Check my upcoming posts for some amazing ways to use these wonderful bold and flavorful peppers - hint, hint... Chile con Queso, Green Chile Cheeseburgers and more. 
 
 
Plus, my version of the famous Silver Coin Margarita to wash it all down the hatch!


Hot and steamy chile peppers


And that is a little slice of Cowgirl right from my own neighborhood.

Have a great week!


Tuesday, August 19, 2014

Opa! It's time for Pastitsio!

One thing I love about this region is the abundance of great Greek food.  Last week a group of co-workers and I headed down the street to the Greek Orthodox Church for its last community luncheon of the summer season.  The food is always spectacular, but the final luncheon, in my opinion, is the best – it’s the one when they serve Pastitsio, Tiropita and Dolmathes.


Please allow me to translate…
Pastitsio is a layered pasta and meat casserole with a rich and creamy topping.

Tiropita or cheese pie is a feta and egg mixture baked inside layers of buttery, melt in your mouth phyllo dough.

Dolmathes are grape leaves stuffed with beef and lamb, rice and savory seasonings.


Hungry yet?


All of these foods were wonderful, but it was the pastitsio that drew huge raves (and a little drool) from our group.  With that said, I think it’s only fitting that I share the directions on how to make this classic Greek dish.


I am pretty sure that Greek goddesses eat pastitsio every chance they get………..I know this Cowgirl does J.


Pastitsio
Assembling pastitsio is easy with a three-step process that includes the preparation of the pasta, the meat sauce and béchamel or cream sauce.


Meat Sauce
1 ½ lbs. ground beef
1 medium onion, chopped
½ teaspoon cinnamon
¼ teaspoon allspice
Salt and pepper to taste
8 oz. can tomato sauce

Pasta
1 lb. Bucatini or other tubular shaped pasta like Penne or Ziti
1 stick butter, melted
3 eggs, lightly beaten
1 c. Kefalotyri or Parmesan cheese, grated

Béchamel sauce
1 stick butter
6 heaping tablespoons flour
Pinch of salt
2 ½ c. milk, lukewarm
3 large eggs
More grated cheese for topping

Cook pasta according to directions, drain and set aside. 


In a large frying pan, brown beef and onions, drain well.  Add salt, pepper, cinnamon and allspice to meat mixture.   Then add tomato sauce and simmer for a few minutes.  Set aside to cool.
 
In a saucepan, melt butter. 


Add flour 1 spoonful at a time, whisking until smooth.  Add salt and milk slowly, stirring constantly.  Bring to a boil to thicken. 


Remove from heat and let cool for a few minutes.  Add eggs, whisking until well mixed. 


In a large bowl, mix pasta, butter, cheese and eggs.

Preheat oven to 350°.  Coat a 9” x 13” baking pan with cooking spray.  Layer 2/3 of the pasta, the meat sauce and the remaining pasta. 


Pour béchamel sauce evenly over the pasta.  Sprinkle with grated cheese. 


Bake for approximately 1 hour or until golden brown on top. 


Have a great week!

Monday, August 11, 2014

Hiking the Tents

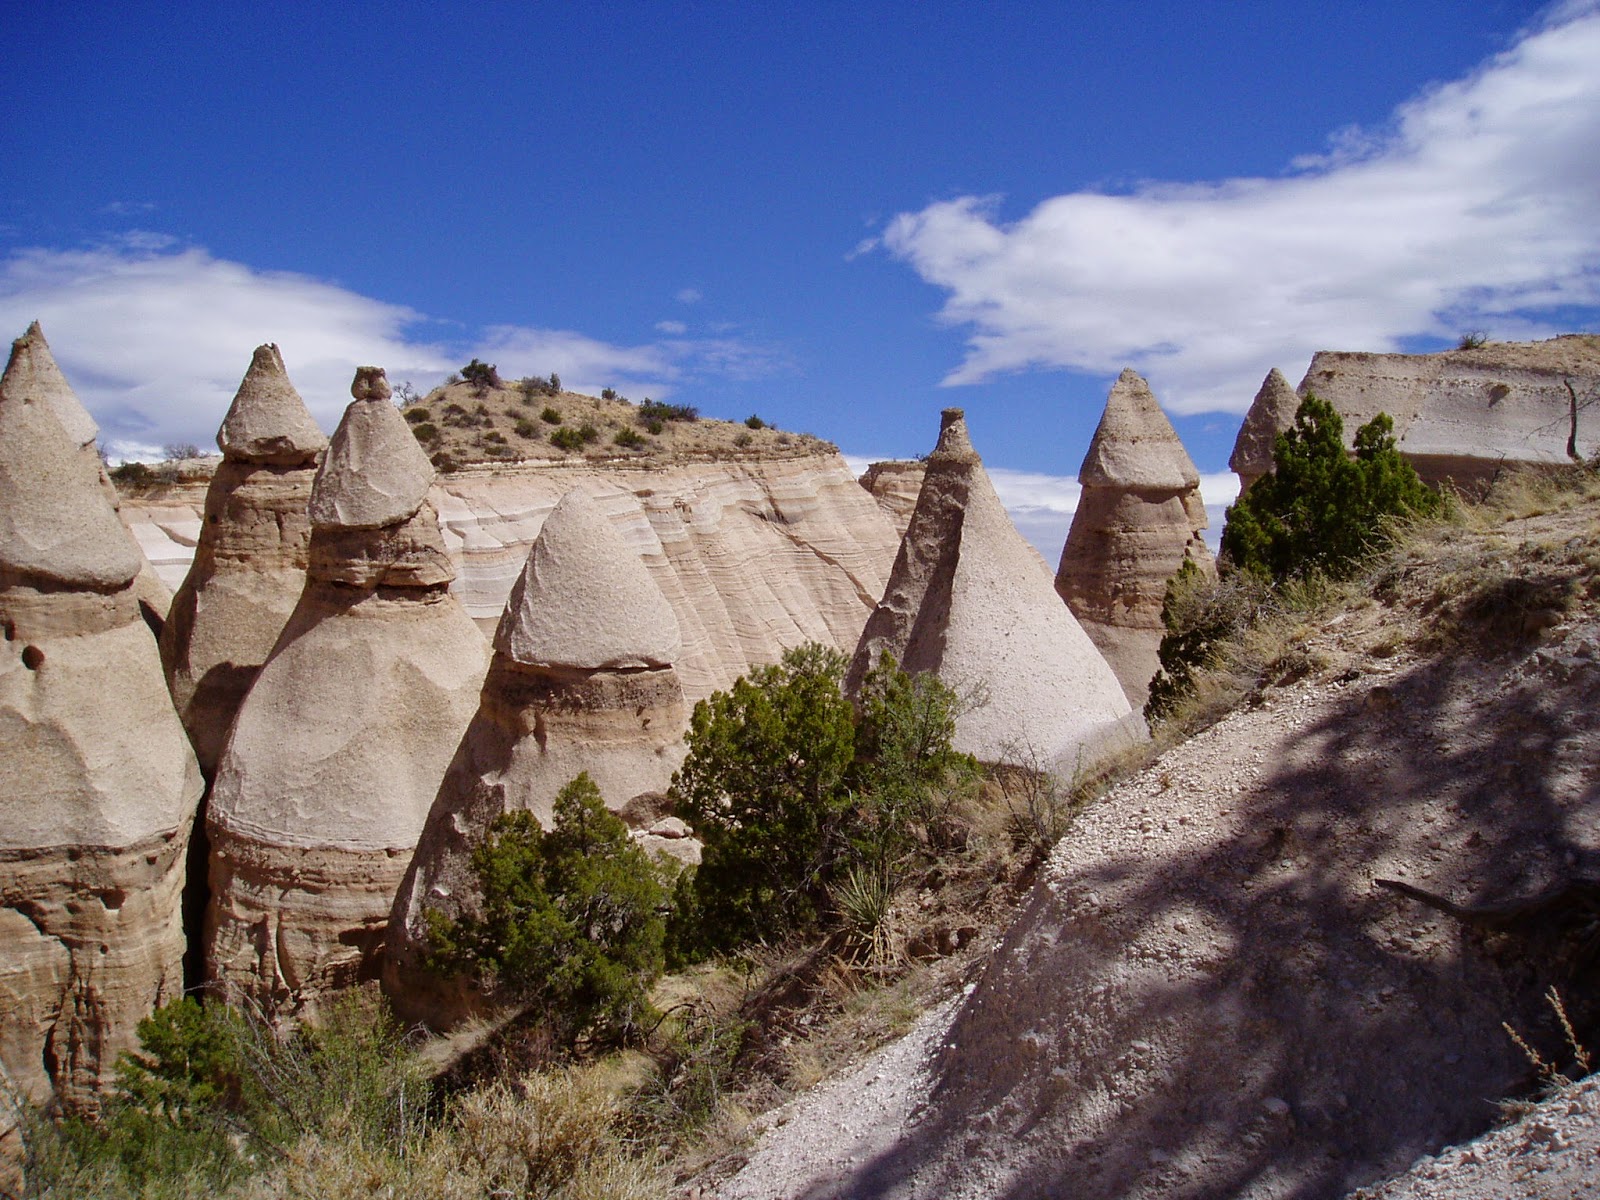
A 40 mile drive southwest of Santa Fe, New Mexico delivers you to the incredible hiking location of Kasha-Katuwe Tent Rocks National Monument. 

Kasha-Katuwe Tent Rocks National Monument


I have to admit that the drive leading to our destination was a bit daunting as there was only a mountain range far in the distance and nothing but desert in between.....


....... nothing but the two of us and our rental.


My husband (the Someday Cowboy)


The final five miles of the drive crossed Pueblo de Cochiti tribal land and led us to the park and trailhead. 


Our hike began at 5570 feet above sea level on a soft, sandy trail around the canyon at the base of the cone shaped rock formations or Tent Rocks. 

The tents are a result  of years of weathering and erosion following a volcanic explosion that occurred 6-7 million years ago.


"Is that a bird or a plane..."


The cobalt blue sky provided a sharp contrast to the whitish colored tips of tents and the crisp mountain air enhanced the serenity of our experience. 


As we spiraled toward our destination of the Mesa, the trail became a bit more aggressive and we found ourselves using our hands to steady ourselves as we climbed.


Upon reaching the Mesa at 6299 feet, we were greeted with spectacular views of the Sangre de Cristo and Jemez Mountains as well as views of the tents which were now completely below us.


The strong gusts of wind kept our visit on the Mesa rather quick as I wondered if we'd be swept away over the canyon and soaring with the eagles.....

.....eerie but thrilling at the same time. 


The trip back down to the canyon was just as beautiful as the trip up, only in reverse.  

Tent Rocks has to be one of my favorite hikes to date.....

.....and one that this Someday Cowgirl will be sure to repeat during her next visit to the area.


Have a great week!


Sunday, July 27, 2014

This Ain't My First Rodeo

Well actually, it was my first rodeo.  I grew up trail riding and hanging out at summer Ranch camp, but this... 


What's not to love? 


There were cowboys, horses, leather chaps with fringe, Texas beef brisket sandwiches and big belt buckles….


Did I mention cowboys?


I was pleasantly surprised by the solid Americana theme running throughout the event which began with a tribute to our soldiers - our American heroes...


...and the singing of Lee Greenwood’s Proud To Be An American.


With a roar of the crowd, the show began...
 

...with bucking broncos knocking around their riders and kicking swirls of dirt into the air. 


Then came the calf ropers and the barrel racers...


...and I can’t forget to mention the rodeo clowns who entertained the crowd with their slapstick comedy routines between events.


This Someday Cowgirl may not be able to call the West her home just yet,


but a good old-fashioned American Midwest Rodeo could tide her over for a while.


Did I mention there were cowboys?


Have a great week!

Monday, July 14, 2014

Bistro Pasta with Grilled Chicken

Bistro Pasta is one of my favorite dinners to make during a sizzling summer evening.  No ovens to turn on… and only fresh and healthy ingredients.  


It’s so simple to make and pops with flavor... 
 
...combining the nuttiness of the cheese, the tanginess of the olives and tomatoes, and the sweetness of the balsamic vinegar and basil. Are you feeling the love?


To make it, you’ll need:

2 large boneless chicken breasts
Extra virgin olive oil
Salt and pepper
12 oz. of your favorite pasta
2 tablespoons toasted pine nuts

1/2 teaspoon minced garlic
½ cup pitted Kalamata olives, sliced
½ cup sundried tomatoes
More extra virgin olive oil
Balsamic vinegar
¼ cup fresh basil, thinly sliced into ribbons
Freshly shaved parmesan cheese

Brush chicken breasts with oil, sprinkle with salt and pepper, and grill until no longer pink.  Allow chicken to rest and keep it warm while you prepare the rest of the dish.


Cook pasta to al dente.  While pasta is cooking, toast the pine nuts in a pan over medium low heat for 8 – 10 minutes or until golden brown. They can burn easily, so keep an eye on them and give the pan a shake every minute or so. 

Drain pasta and slice the chicken on a bias.

Now you are ready for the big finish…


In a large bowl, combine pasta, garlic, olives, tomatoes, half of the basil, and half of the pine nuts. Drizzle with about 1 tablespoon of Balsamic vinegar and two tablespoons of olive oil.  Spoon mixture into serving bowls.  Top each bowl with sliced chicken.  Garnish with remaining basil, pine nuts, black pepper and shaved parmesan. 

And there it is… beautiful and delicioso!

Have a great week!